Introduction:
Note: Check the video description of this article here https://youtu.be/Yg440qAekww?si=ieAOuzN2ZggTAvcI
This article will go over how to use the lovely imgui library with SDL2.
We need to first understand how the pixel will draw in SDL2 before we can grasp lovely imGui. To draw a basic pixel on an SDL window, we require the SDL’s fundamental objects listed below.
- SDL_Window
- SDL_Renderer
- SDL_Texture
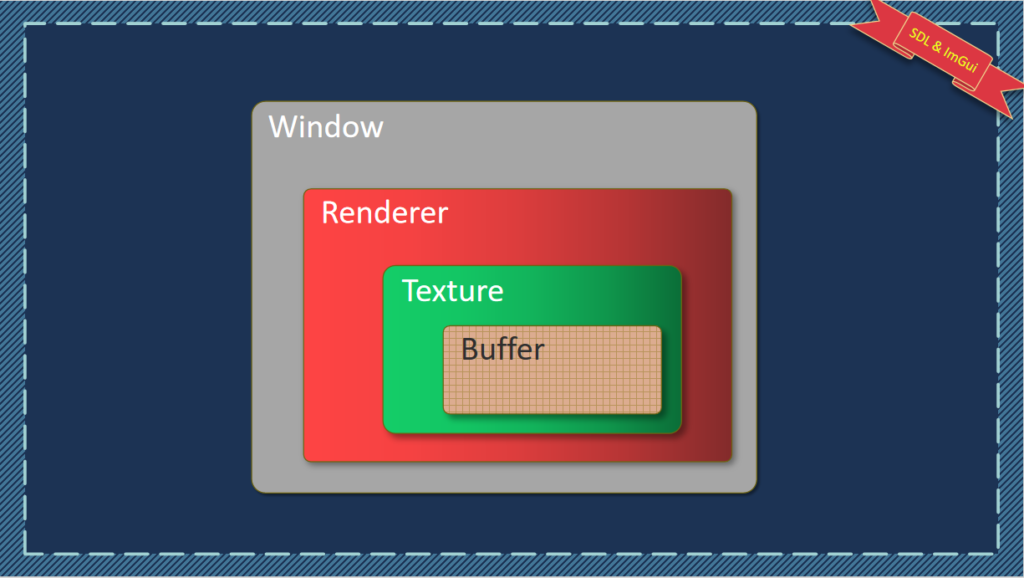
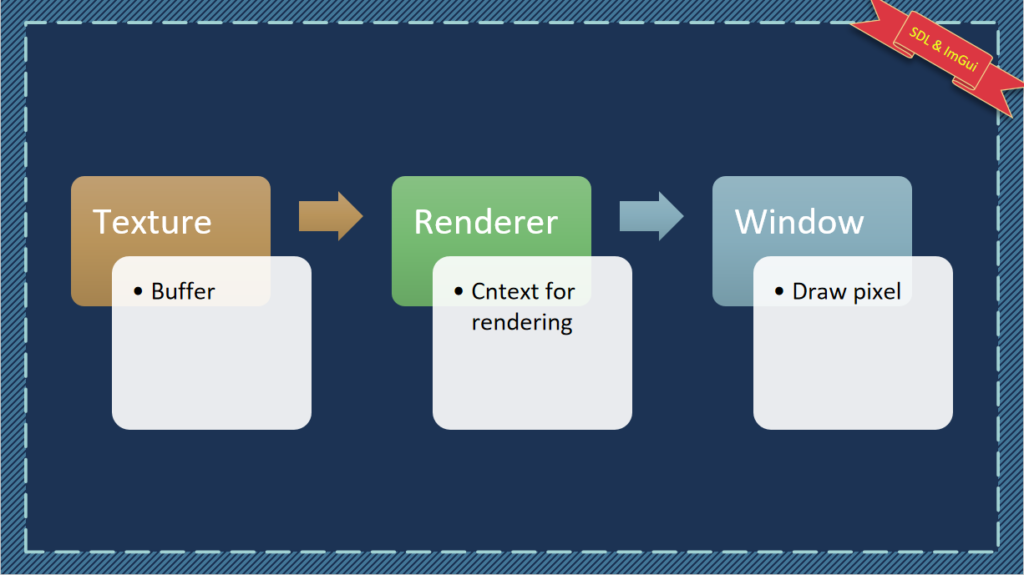
The rendering process can be broken down into three simple parts.
- Create a texture with required dimentions, pixel data (i.e buffer)
- Send this texture information to the renderer, which we can refer to as context.
- Lastly, fill the pixels with colour using the renderer context in the window.
Dear ImGui process:
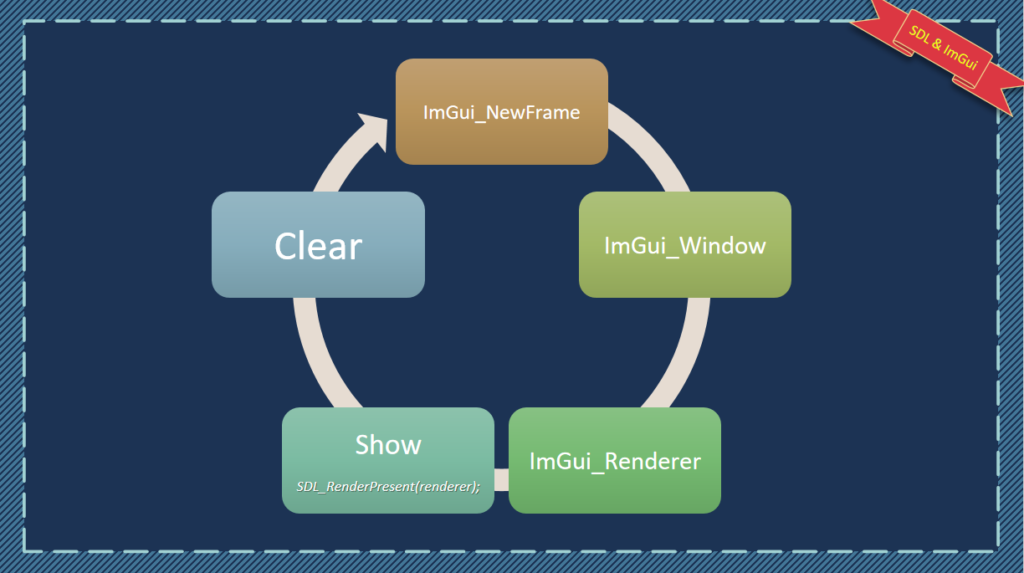
According to the schematic above, we are passing texture data straight to the SDL renderer. Likewise, the ImGui render data needs to be sent to the SDL renderer.
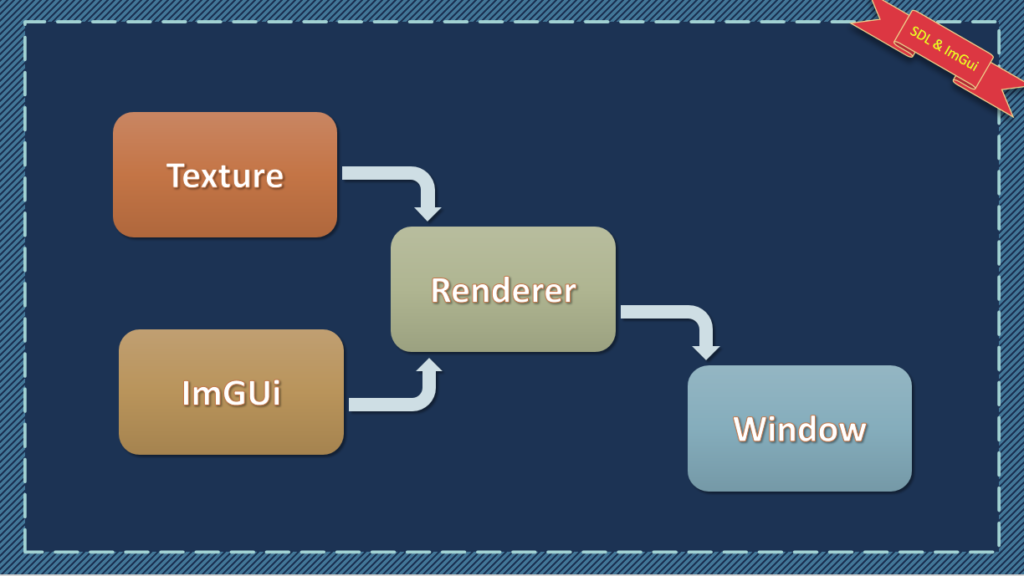
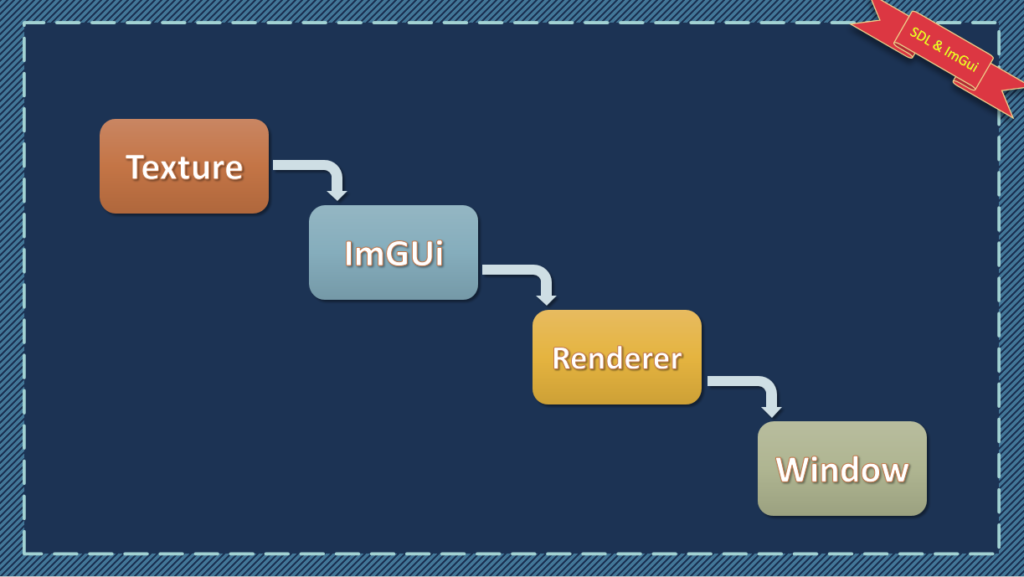
As an alternative, we may send the renderer the ImGui data after receiving the texture data from it.
Dear ImGui setup:
Download or clone the dear ImGui repo from https://github.com/ocornut/imgui
Personally, I’d advise using git to clone the repository to your local drive. From there, you can modify the branches to suit your needs.
Once the repository has been downloaded to your local computer, create an imgui filter in Visual Studio’s Header Files and Source Files sections.
Dockable windows: If we want to use the dockable/floating windows feature, we need use the docking branch instead of the master branch.
In the Header Files folder, place the imgui header files, and in the Source Files section, place the imgui cpp files.
Your solution explorer should now look like this once you’ve added the .h and .cpp files.

Download the full source code from my git hub repository
https://github.com/Sankar-PS/dear_ImGui_and_SDL2/blob/main/dear_imgui_and_sdl2_intro.cpp
1. Inlcude ImGui headers
//imgui headers
#include "imgui.h"
#include "imgui_impl_sdl2.h"
#include "imgui_impl_sdlrenderer2.h"
2. ImGui context
The imgui context function, which takes SDL_Window* and SDL_Renderer* as inputs, is seen below.
void setup_imgui_context(SDL_Window* sdl_window, SDL_Renderer* sdl_renderer)
{
	// setup Dear ImGui context
	IMGUI_CHECKVERSION();
	ImGui::CreateContext();

	ImGuiIO& io = ImGui::GetIO();
	(void)io;

	io.ConfigFlags |= ImGuiConfigFlags_NavEnableKeyboard;     // Enable keyboard controls
	io.ConfigFlags |= ImGuiConfigFlags_NavEnableGamepad;      // Enable Gamepad Controls
	io.ConfigFlags |= ImGuiConfigFlags_DockingEnable;         // Enable Docking
	io.ConfigFlags |= ImGuiConfigFlags_ViewportsEnable;       // Enable Multi-Viewport / Platform Windows

    // theme
	ImGui::StyleColorsDark();

	// Setup Platform/Renderer backends
	ImGui_ImplSDL2_InitForSDLRenderer(sdl_window, sdl_renderer);
	ImGui_ImplSDLRenderer2_Init(sdl_renderer);

	// Start the Dear ImGui frame
	ImGui_ImplSDLRenderer2_NewFrame();
	ImGui_ImplSDL2_NewFrame();
}
Code Explaination:
We should construct an ImGui context before rendering, as indicated in the imgui process section.
// context
IMGUI_CHECKVERSION();
ImGui::CreateContext();
Using ImGuiIO to enable input output processing. now, we will enable keyboard and docking panels.
// get ImGui's Input/output object
ImGuiIO& io = ImGui::GetIO();
(void)io;

// Enable keyboard controls
io.ConfigFlags |= ImGuiConfigFlags_NavEnableKeyboard;

// Enable Docking Multi-Viewport / Platform Windows
io.ConfigFlags |= ImGuiConfigFlags_DockingEnable;
In the same way that we used SDL_init() to initialise sdl, we should use the two methods listed below to initialise ImGui.
// Setup Platform/Renderer backends
ImGui_ImplSDL2_InitForSDLRenderer(sdl_window, sdl_renderer);
ImGui_ImplSDLRenderer2_Init(sdl_renderer);
Before rendering any scene, we must include the ImGui frame in the main loop of sdl, therefore in order to interact with frames, we must use the two procedures shown below.
// Start the Dear ImGui frame
ImGui_ImplSDLRenderer2_NewFrame();
ImGui_ImplSDL2_NewFrame();
3. Basic ImGui Window
Add the below code in the main loop of sdl
// Start the Dear ImGui frame
ImGui::NewFrame();
// properties window
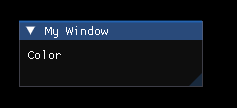
ImGui::Begin("My Window");
ImGui::Text("Color");
ImGui::End();
// send ImGui context to SDL Renderer context
ImGui::Render();
ImGui_ImplSDLRenderer2_RenderDrawData(ImGui::GetDrawData());
// show all renders now
SDL_RenderPresent(renderer);
// clear the renders
SDL_RenderClear(renderer);Code Explaination:
The above code will show a basic ImGui window like below
In every frame the rendering process will looks like the below loop
4. Connect SDL_Texture to ImGui::Image
As shown in the introduction we will pass the SDL Texture to the ImGui::Image object, so we can view our texture in separate ImGui window.
let’s the below code will create SDl_texture with SCREEN_WIDTH and SCREEN_HEIGHT as dimentions
// Create SDL Texture
SDL_Texture* texture = SDL_CreateTexture(
	renderer,
	SDL_PIXELFORMAT_RGBA8888,
	SDL_TEXTUREACCESS_STATIC,
	SCREEN_WIDTH,
	SCREEN_HEIGHT
);
To access that texture object Inside the main loop add the below code after ImGui’s new_frame
// Screen window
ImGui::Begin("Screen");
{
	ImGui::Image((void*)texture, ImVec2(SCREEN_WIDTH, SCREEN_HEIGHT));

	// End of Particles window
	ImGui::End();
}